You have seen lots of people using GPT-3 for generating content.
And they are all talking about how easy it is to use, and it’s the next best thing since sliced bread.
But there is no information on using the GPT-3 API to generate content, specifically on the WordPress platform.
You want to generate great content for your WordPress site.
You want to get more traffic from search engines.
You want to build a viral site that attracts visitors from all over the world.
But it is tough to figure out how to use this state-of-the-art AI technology.
How do you even start?
The documentation is so complicated, and there is no specific guidance on using it on a WordPress website.
But most importantly, it seems to require a lot of programming skills that you don’t possess.
If you are not a programmer, it is tough to figure out how to integrate this API into your website.
You will spend hours and hours trying to get this thing to work, and you will finally give up in frustration.
And once you finally give up, you will never be able to put GPT-3 into good use. So basically, you have wasted time, money, and effort trying to make this API work…
So, in this article, you will learn how to generate content for your WordPress site using GPT-3 in an effortless way.
You are not going to need any programming skills or any technical experience.
Sounds good?
Let’s dive in…
Step #1: Install & Activate AI Mojo plugin in your WordPress site
The first thing you need to do is install the AI Mojo plugin into your WordPress site.
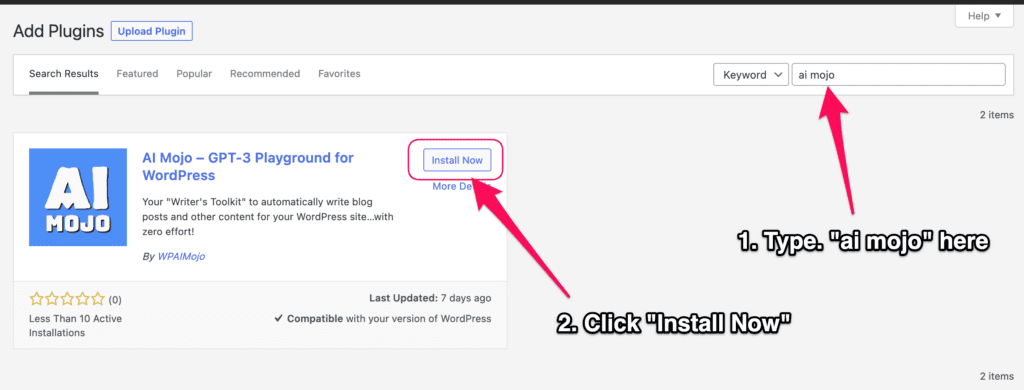
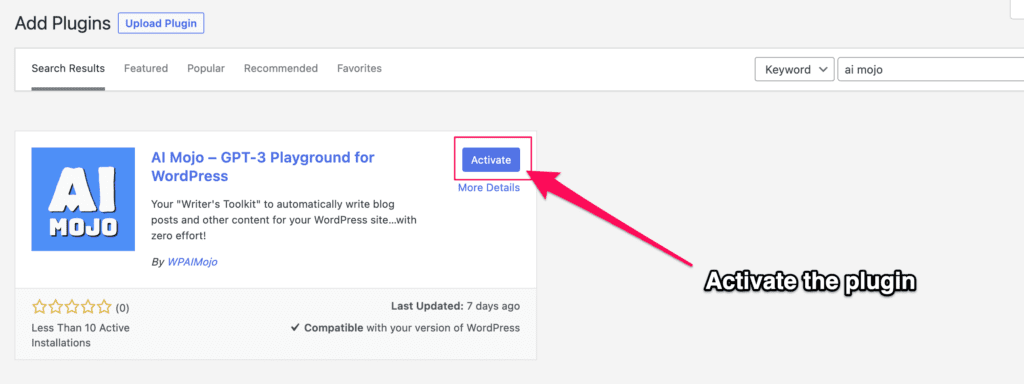
Alternatively, you can also get this plugin from this link: https://wordpress.org/plugins/ai-mojo/.
This plugin is free, and you can install it in about a minute.
After you’ve installed & activated the plugin, you’ll see a message like this:

Here you have the option of whether to opt-in to Freemius.
If you want to skip this, press the “Skip” button. No worries – the plugin will still work perfectly even if you don’t opt-in 🙂
Step #2: Setting up AI Mojo.
Next, you’ll be redirected to the setup wizard.
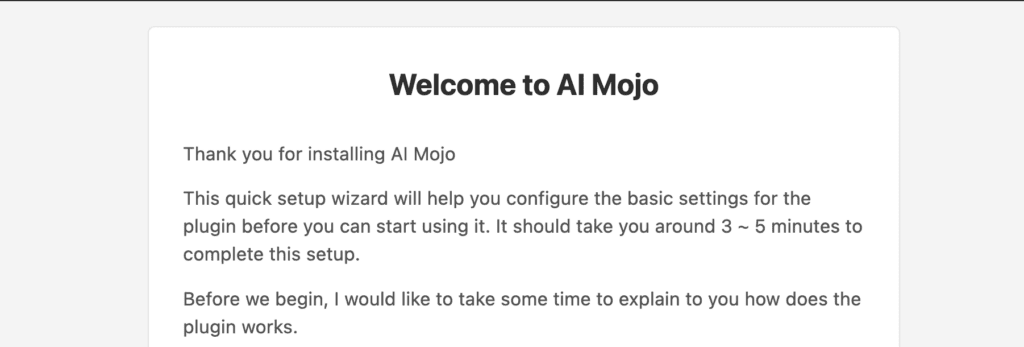
Read the instruction there, then click the “Let’s Get Started!” button to continue.
On this screen, you will be presented with a choice:
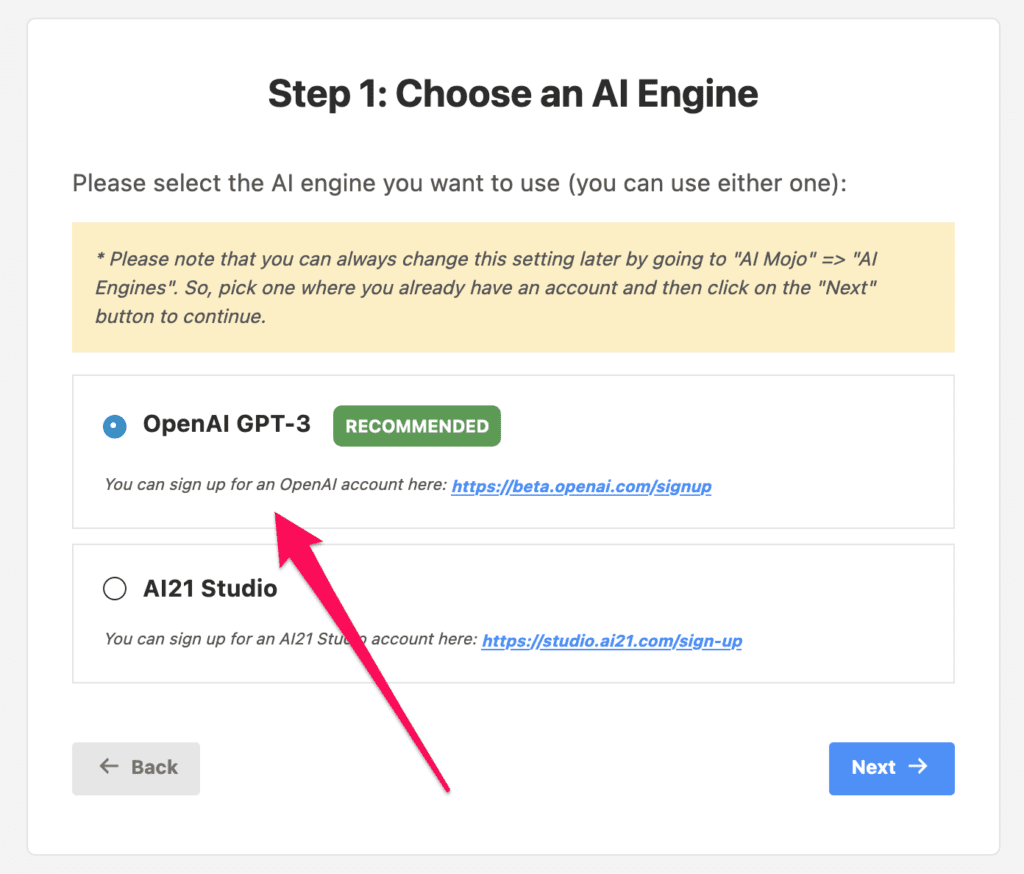
Select the “OpenAI GPT-3” option, and click the “Next” button.
After you’ve chosen your AI engine, you’ll need to insert your GPT-3 API key into your WordPress site:
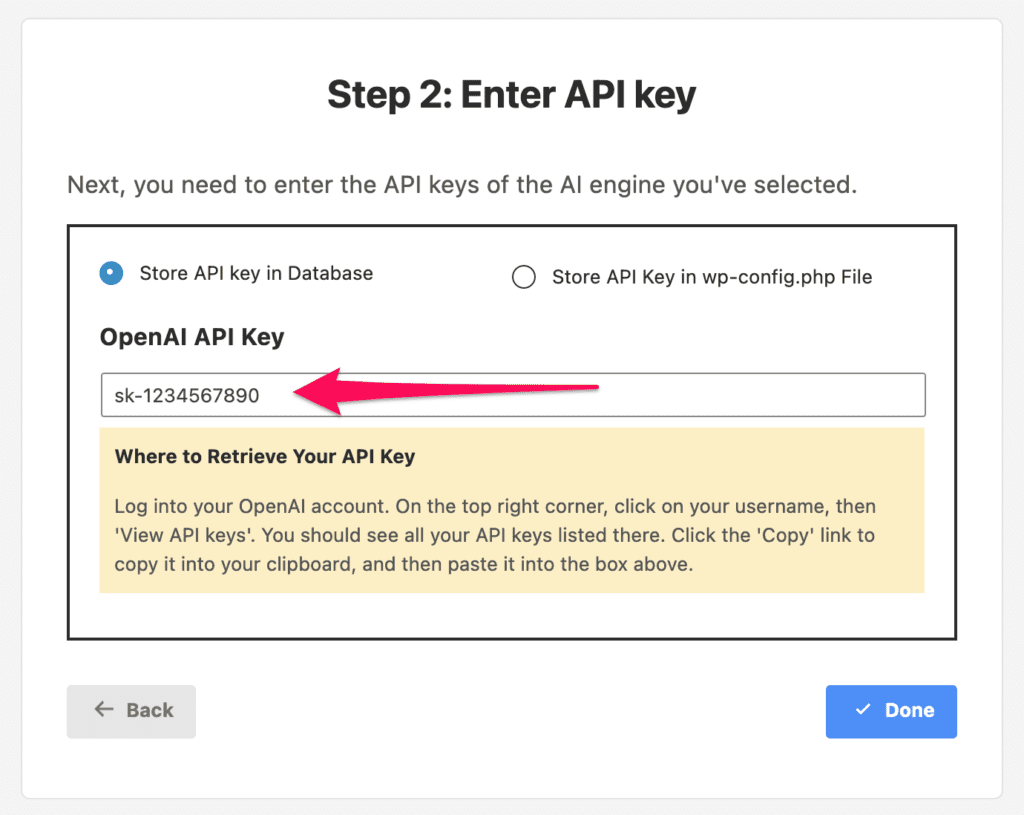
Here you’ll have the option to store the API key in the database or your wp-config.php file.
Note: If you weren't sure where to retrieve your GPT-3 API key, log into your OpenAI account. Click on your username on the top right corner, then 'View API keys'. You should see all your API keys listed there. Click the 'Copy' link to copy it into your clipboard, and then either paste it into the "API Key" box or in your wp-config.php file.
Once you’ve inserted your API key, click the “Done” button to finish the setup.
You’re now ready to start using the GPT-3 on your WordPress site.
Step #3: Start generating content.
Now that you’ve done all the setup, you’re ready to start generating content for your WordPress website.
Go to your post (or page) editor and click on the ‘Gamepad’ icon on the top right to show the AI Mojo panel.

Under the ‘Playground’ tab, you should see various options available for you to play around with. Just enter your prompt, select an AI engine & model, then click the ‘Generate’ button to generate content.

Once the content has been generated, you’ll be able to see it under the ‘Results’ tab.

You’ll have the option to add the generated content to ‘Notes’, as well as copy it and paste it into your post or page editor.

Conclusion
That’s all there is to it.
Now you have GPT-3 integrated with your WordPress site, which will dramatically boost the speed of your content generation efforts.
You’ll be able to generate high-quality, unique content for your WordPress site very quickly, which will make your visitors happy, and you’ll be able to rank in search engines for keywords easily.